Step-by-step instructions for building a floating plant island for ponds A floating pond island is like a floating pond planter only better. It is a floating island that can drift arounbd your pond that is full of plants. Anything from grasses to irises will grow. You can plant almost anything into a homemade floating island. There are commercially available versions of floating islands and floating planters but they are costly. With a few simple tools and some readily available products you can build your own floating island and have it planted and floating in your pond in only a few hours and much cheaper. It is also a great project! |
||||||||||||||||||||
|
Building
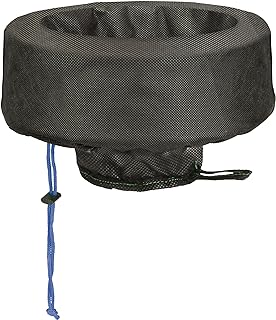
A Floating Island Instructions for a small homemade floating island Version One - Our First Island : This is for an 18" x 10" floating island Required Materials We Used These are Amazon links. As an Amazon affiliate we may recieve payment for purchases made through Amazon. Coarse Filter Material 1.5" to 2" thick filter medium available at any pond store or aquarium store. It's the same filter material that is in pond filter falls or in biological filters. Usually comes in white, blue or black with different densities. Any fish safe pond filter material will work. There are some cheap filters for furnaces and dust collection systems but you should use a proper filter material used in pond skimmer or filters so you know it will last and won't hurt your fishies. Waterfall Foam The same expanding foam that is used in building a pond waterfall can be used to provide bouyancy for your homemade floating island. You will need less than a can for the small island. We wanted to use the Rockin'Foam™ waterfall foam but didn't have any so we bought Great Stuff™ insulating foam sealant. Because the filter material is white the yellowish color of the Great Stuff foam was a little less obvious. We are going to try a black coarse filter material next time and will use the black pond waterfall foam so it hides better. Carpet Knife/Box Cutter or Heavy-Duty Knife You will need to cut the filter material into the shape you want. A long blade can make the job easier. A box cutter type of blade with a secure handle and adjustable steel blade can do the job. Screwdriver & Scissors Something to poke holes in the filter medium so you can inject the foam into the holes. Scissors can be good to do the finishing to sculpt the island smooth and make nice conoured edges. Fishing Line and Heavy Duty Sewing Needles We sewed two layers of the cut and shaped filter material together to create a thicker floating island. It was a nice experiment! Using a large 2" straight needle and a 3" curved needle we were able to sew the layers together and then sew the edges together almost like a hem.
|
|||||||||||||||||||
 Draw
the shape of your island on a piece of cardboard, we used a
green file folder because we had one handy. We drew our island
shape that looked a bit like a bif footprint. You could make
any shape island you want. We're going to try different shapes
but this was our first attempt at building a pond island so
we'll use it.
Draw
the shape of your island on a piece of cardboard, we used a
green file folder because we had one handy. We drew our island
shape that looked a bit like a bif footprint. You could make
any shape island you want. We're going to try different shapes
but this was our first attempt at building a pond island so
we'll use it.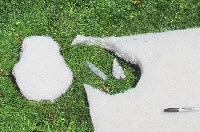 Use
the carpet-knife or box cutter or sharp blade to carefully cut
the shape of your island out of your piece of filter material.
Use
the carpet-knife or box cutter or sharp blade to carefully cut
the shape of your island out of your piece of filter material.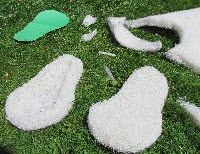 Once we had our two identical shapes cut out of our 2"
filter material we chose one as the top section and carefully
carved out a "bowl" in one of the sections. We wanted
a bowl to hold the soil for our plants so with our 2" thickness
we carved out about 1.5" so we had about half an inch at
the bottom of our top island section.
Once we had our two identical shapes cut out of our 2"
filter material we chose one as the top section and carefully
carved out a "bowl" in one of the sections. We wanted
a bowl to hold the soil for our plants so with our 2" thickness
we carved out about 1.5" so we had about half an inch at
the bottom of our top island section.  In
this first attempt at building our diy floating pond island
we wondered how to make sure the top and bottom sections stayed
bonded togeher.
In
this first attempt at building our diy floating pond island
we wondered how to make sure the top and bottom sections stayed
bonded togeher. 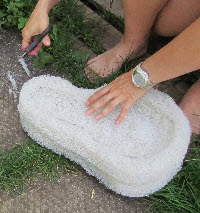 Carefully
shape the island. We used scissors to just slope the edge of
the island so it was smooth and even. Be careful l not to cut
the fishing line that holds the two sections together.
Carefully
shape the island. We used scissors to just slope the edge of
the island so it was smooth and even. Be careful l not to cut
the fishing line that holds the two sections together.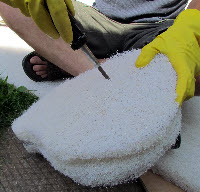 To
be able to inject the foam into the filter material you need
to poke some holes into the island. We used a screwdriver to
poke holes through the island. We basically made the hole go
all the way through the island.
To
be able to inject the foam into the filter material you need
to poke some holes into the island. We used a screwdriver to
poke holes through the island. We basically made the hole go
all the way through the island.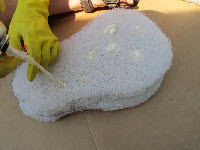 Slowly
inject the waterfall foam or expandable foam into the holes
you poked with the screwdriver. The foam expands to many times
the original spray size so go slow. The cans of foam come with
strawlike injectors so you can just push the injector into the
hole you make in the island and slowly...slowly release the
foam.
Slowly
inject the waterfall foam or expandable foam into the holes
you poked with the screwdriver. The foam expands to many times
the original spray size so go slow. The cans of foam come with
strawlike injectors so you can just push the injector into the
hole you make in the island and slowly...slowly release the
foam. Let
it dry.
Let
it dry.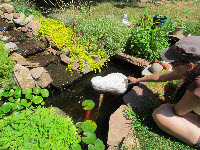 After
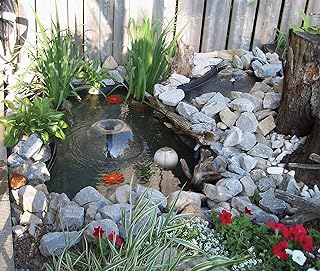
our island dried we took it to the pond to test it out. It
floated! We were so happy and the fish were very curious about
it and right away were swimming underneath it!
After
our island dried we took it to the pond to test it out. It
floated! We were so happy and the fish were very curious about
it and right away were swimming underneath it!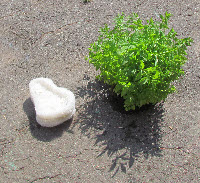
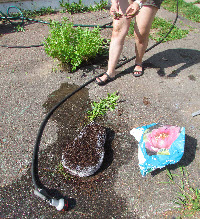 We
start by using an aqutic planting soil and some peat-moss and
rubbing it into the island. We soaked it with a hose and rubbed
the soil mix with a bit of peat into the island. We could see
that the soil mixture started filling the spaces between the
white fibres of the island.
We
start by using an aqutic planting soil and some peat-moss and
rubbing it into the island. We soaked it with a hose and rubbed
the soil mix with a bit of peat into the island. We could see
that the soil mixture started filling the spaces between the
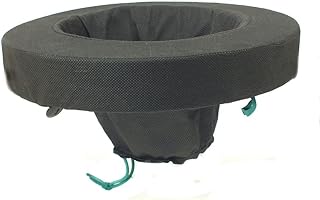
white fibres of the island.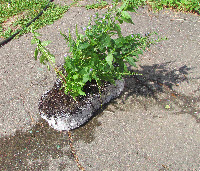 Here
is the finished product fresh off the assembly line!
Here
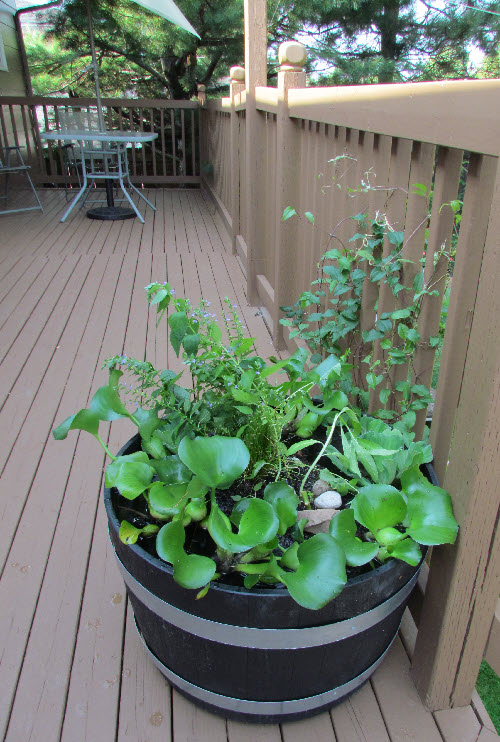
is the finished product fresh off the assembly line! 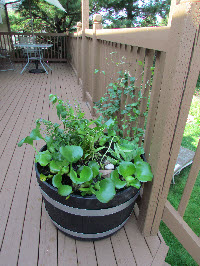 Here
is our floating island in the "test pond"! We added
some of the water hyacinths that were growing like crazy in
our pond to the barrel to create a nice ring around our freshly
planted floating island which sits in the middle.
Here
is our floating island in the "test pond"! We added
some of the water hyacinths that were growing like crazy in
our pond to the barrel to create a nice ring around our freshly
planted floating island which sits in the middle.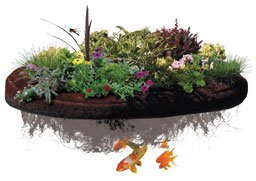
| Looking
for a small pond pump? See Our Choices For Pumps on Amazon As an Amazon affiliate we may recieve payment for purchases made through Amazon. |
||||||